Memcached is a service that allows entire database tables to be stored in memory, drastically speeding up queries to those tables and alleviating database load. In WordPress and W3 Total Cache, the Memcached module allows you to store all cache tables in memory.
This guide can be used to set up Memcached on CentOS.
Install memcached through RPM
The easiest way to install Memcached is through a package manager such as yum or apt.
Now we can simply use yum (or apt) to install Memcached:
yum install memcachedAfterwards you can confirm memcached is up and running by calling it.
memcached -h

memcached 1.2.6
Install the Memcache PECL Extension
Even though memcached is happily running on the server, it’s not accessible from PHP without the PECL extension. Fortunately this is a very easy process, just use the pecl command.
pecl install memcache
If the pecl install fails you will need to use the alternative method:
$ wget http://pecl.php.net/get/memcache-3.0.6.tgz
tar xvfz memcache-3.0.6.tgz
cd memcache-3.0.6
phpize
./configure
make && make install
Then add the memcache extension to your php.ini file, usually at /usr/local/lib/php.ini.
extension=memcache.soAnd finally restart Apache so that it will pick up the new extension:
/etc/init.d/httpd restart
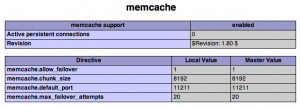
Running phpinfo() on your webserver should now confirm that memcache is installed:
Set up Memcached as a service
Just having memcache installed will not do anything by itself, we need to actually start up some instances of it for our web server to connect to, and we need memcached to automatically start up when the server restarts.
For this we need to install a new script at /etc/init.d/memcached. For this I usually use a custom script that’s a bit crude, since it assumes that memcached is being used exclusively for our web server. However, most of the time this is true and it works just fine.
Download the memcached script (rename to just “memcached”).
So simply load this script into /etc/init.d. Then set the permissions on it to make it executable:
chmod 755 memcachedThen register the script to start up with the server:
chkconfig --add memcachedNow you can start up memcached as a service.
service memcached startAnd you can confirm that memcached has fired up several instances by checking ps.
ps -e | grep memcached

22805 ?        00:00:59 memcached

22807 ?        00:00:58 memcached

22809 ?        00:01:16 memcached

22811 ?        00:00:55 memcached

22813 ?        00:00:01 memcached

22815 ?        00:01:02 memcached

22817 ?        00:00:27 memcached

22819 ?        00:00:35 memcached

22821 ?        00:00:01 memcached

22823 ?        00:00:01 memcached

22825 ?        00:00:01 memcached
And that’s it! You may need to change the /etc/init.d/memcached file to match your needs depending on what you’re using Memcached for.
Originally posted 2016-01-11 05:53:00.


